Using Layouts in MS Excel
Last updated on 2025-01-08
Overview
The layouts defined in a Layout Robot can be applied in an Excel table. The applied layouts will be adopted automatically when the table is inserted in a Word document.
Applying a Layout
To apply a layout defined in a Layout Robot to an Excel table:
- Select the table cells for which you want to apply a layout.
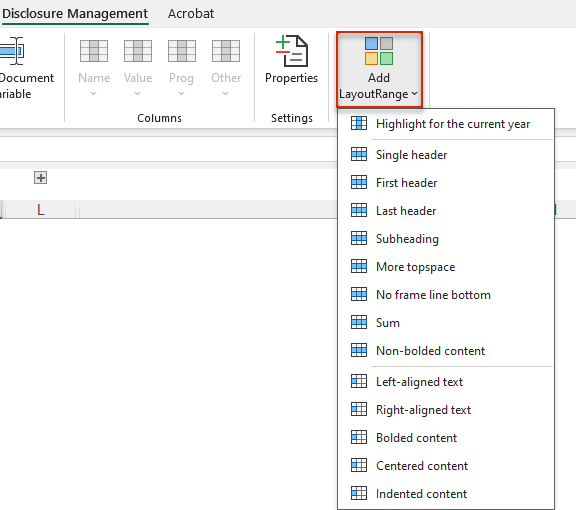
- Click Add Layout Range in the Excel ribbon. The menu containing the layouts available in the selected Layout Robot will be displayed:

'Add Layout Range' button in the Excel ribbon - Select the desired layout from the menu.
- If necessary, repeat the process for other cells in the table.
- Click Check In in the Excel ribbon.
- If the outarea defined in the Excel file has already been applied in a Word document, the layout changes will only become visible when the Excel file is checked in.
- If you checked out both documents at the same time, you can make the changed layout visible by clicking the Update button in the Word Ribbon.
A separate layout robot can be stored for each document in Lucanet Disclosure Management.
To assign a layout robot to a document, you must open the Configure document workspace and add a layout robot in the Layout Robot settings area (see also Configuring a Document).
This is also where you can use the icon ![]() to save an already assigned layout robot locally, e.g. to use it in another document.
to save an already assigned layout robot locally, e.g. to use it in another document.
