Detail View of a Chapter
Last updated on 2024-10-28
Overview
The detail view of a chapter in shows the most important information on the chapter and the MS Office files defined for it, and provides context-specific functions. The most important Information and options in the detail view of a chapter are:
- Rename or delete Chapter
- Change the Status of a chapter
- Open, edit or delete MS Office files
- Show History for MS Office files
- Show Previous versions of MS Office files
- Add Section break to Word files
- Show the Mode of Excel files
- Open Data view for Excel files
This article contains the following sections:
Opening the Detail View of a Chapter
To open the detail view of a chapter:
- Go to the overview and click Cockpit. Alternatively, go to the function bar and click Document.
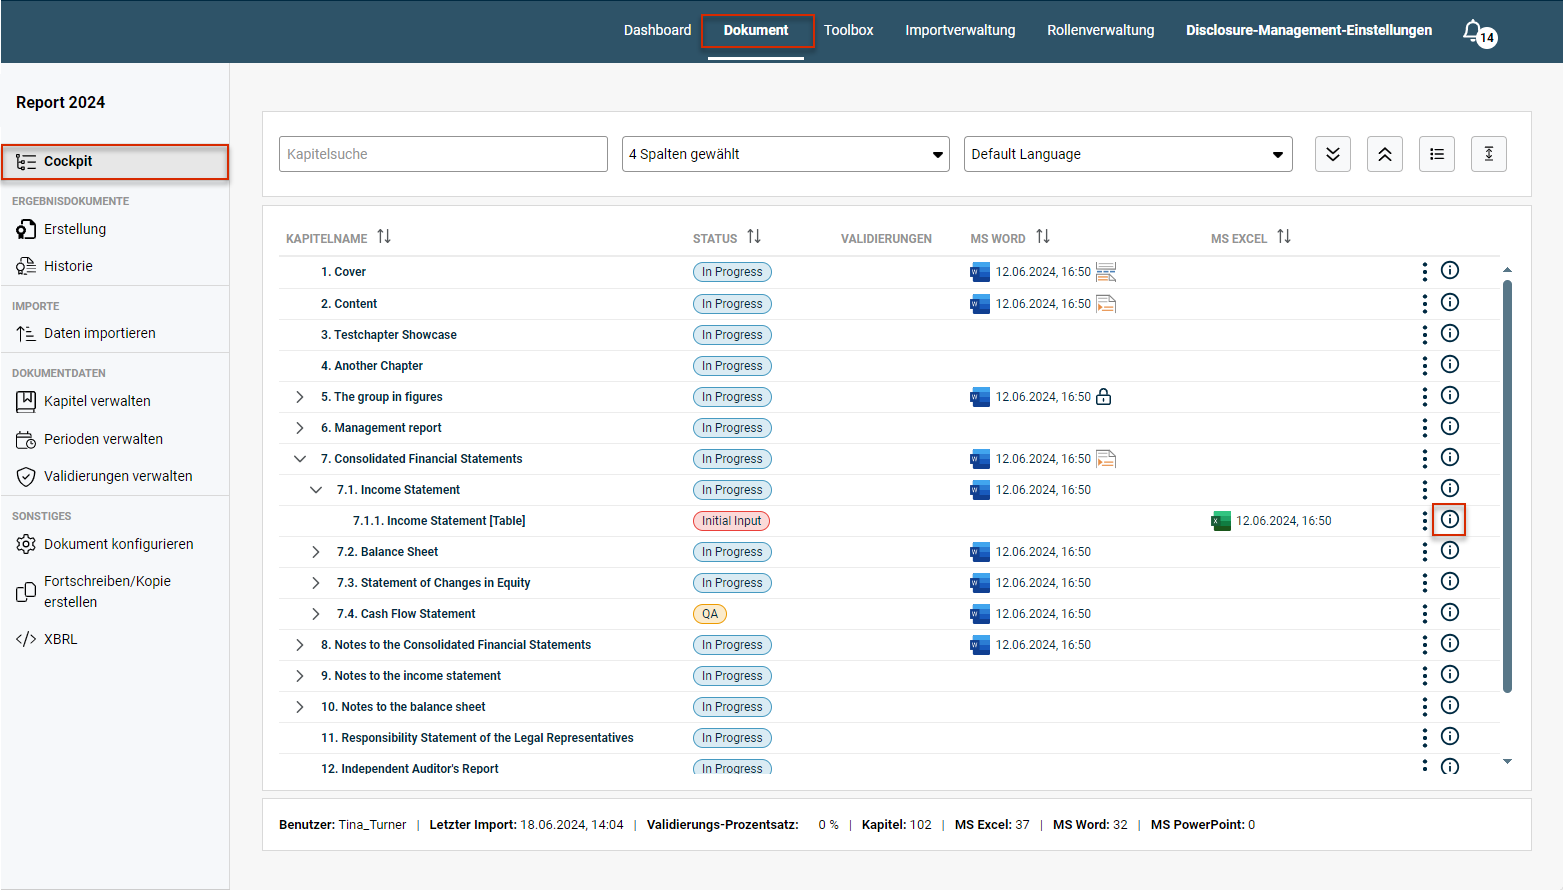 Opening the detail view of a chapter
 - Click the
 icon to open the detail view of a chapter. The detail view of a chapter is displayed as follows, for example:
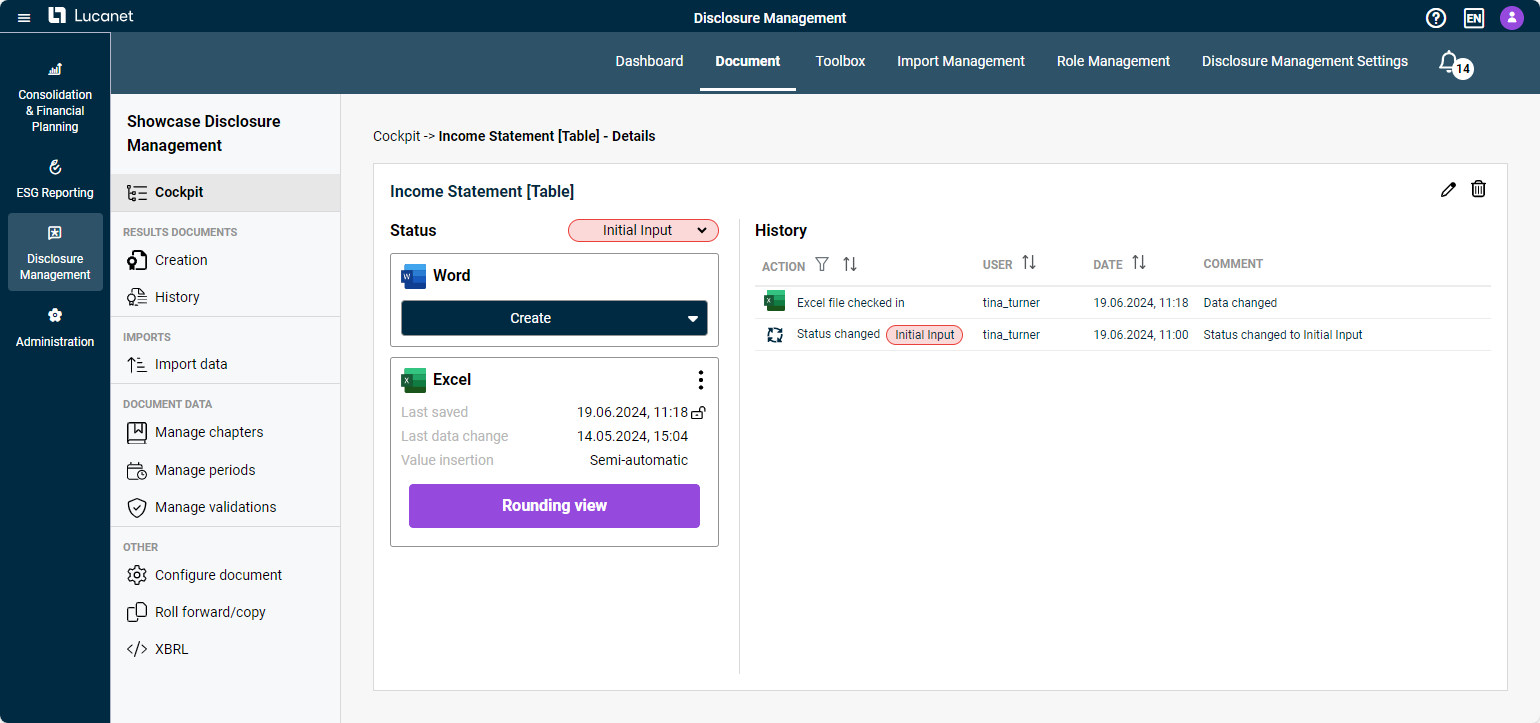 Detail view of a chapter
Options in the Detail View of a Chapter
The following options and information are available in the detail view of a chapter:
 Options in the detail view of a chapter
Description
The following options are available in the detail view of a chapter:
Rename chapter
Click the ![]() icon to rename the chapter.
icon to rename the chapter.
Delete chapter
Click the ![]() icon to delete the chapter.
icon to delete the chapter.
Status
In the Status drop-down list, you can change the status of the document.
The status change will not be shown in the history until the detail view of the chapter is re-opened.
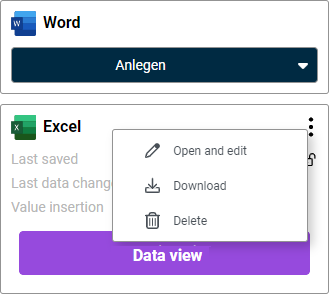 Options for Word files in the detailed view of a chapter
Description
The menu under the three dot icon ![]() contains the following functions for all MS Office files:
contains the following functions for all MS Office files:
- Open and edit
- Download
- Delete
The following information is displayed for all MS Office files:
Last saved
Date on which the MS Office file was last saved. This option also shows whether or not the file is locked. If the ![]() icon is displayed, the file is locked.
icon is displayed, the file is locked.
Locked files can be unlocked in the Cockpit.
Last data change
Date of the last data change. A data change is displayed if a new data import that resulted in changes to the data has been carried out.
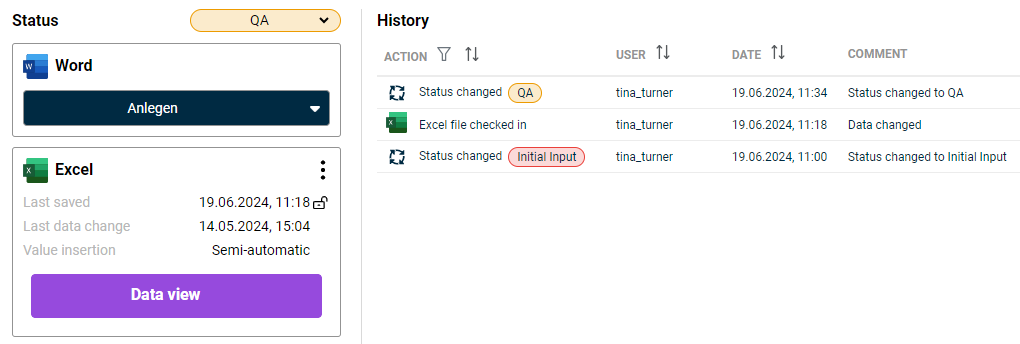 History of a document
Description
The History list shows the changes that have been made in the selected chapter. The following changes are displayed:
- Check-ins for MS Office files
- Changes to the chapter’s status
- Data changes in the MS Office files
- Deletions of MS Office files
To filter the changes shown in the history, click the ![]() button.
button.
Open previous version
You can open any of the versions shown in the history at any time. To do this, click the Word or Excel icon for the selected file in the History.
Then check in the file again to update the values changed since saving the restored version (for example by re-importing the data) if necessary.
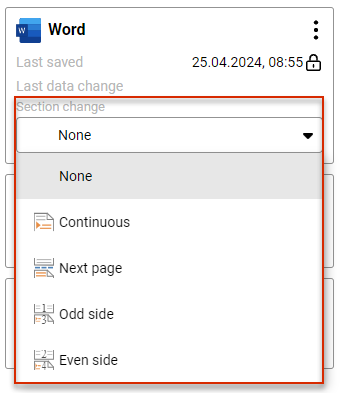 Add Section change to a Word file
Description
You can use Section breaks to define different areas for different layouts or formats within the Word file for a chapter.
The following section breaks are available in the Section break drop-down list for Word documents:
Section break
Description
Continuous
You can use the Continuous section break if you want to use multiple different formats on one page, for example (e.g. different number of columns).
Next page
The new section starts on the next page. You can use the Next page section break if you want new chapters to automatically start on a new page, for example.
Odd side
The new section will start on an odd-numbered page. You can use the Odd side section break if you want new chapters to automatically start on an odd-numbered page, for example.
Even side
The new section will start on an even-numbered page. You can use the Even side section break if you want new chapters to automatically start on an even-numbered page, for example.
The selected section break will be indicated by an icon in the Cockpit for the document in question.
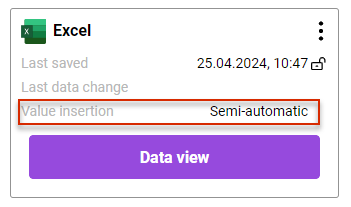 Options for Excel files in the detailed view of a chapter
Description
Value insertion
Displays the mode used to add values to the Excel file.
The Mode of an Excel File indicates what procedures will be used to import and update report values.
Data view
Opens the Data View. You can use the data view to correct rounding or Validation Errors.