Using Layout Actions in MS Word
Last updated on 2025-01-08
Overview
With the help of layout actions, you can apply a layout you have defined in Lucanet Disclosure Management’s layout robot to an Excel worksheet that you want to insert in Word.
By saving a layout robot, you can use layout actions in MS Excel and MS Word to give your tables a uniform design. Use the Configure document option to assign a layout robot to a document.
This article contains the following sections:
Opening the Layout Actions Assistant
To use layout actions in MS Word:
- In the Word document, position your cursor in the table to which you want to apply layout actions.
- Go to the Word ribbon and click the Insert layout actions button.

Open the ‘Layout Action’ dialog from the Word ribbon - The Layout Action dialog is displayed in MS Word:
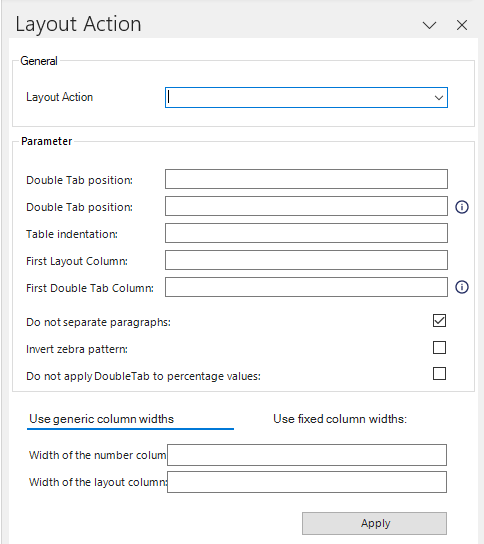
'Layout Action’ dialog - Configure the layout action (see Configuring Layout Actions), then click Apply.
Configuring Layout Actions
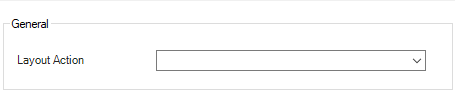 'General' area in the 'Layout Action' dialog
Description
In the General section of the Layout Action dialog, you can select and configure the table layouts defined in the layout robot.
Layout Action
Click the corresponding table in the Word document and select the required layout from the drop-down list.
If there are no entires in the Layout Action drop-down list, you will first need to assign a layout robot to your document under Configure document.
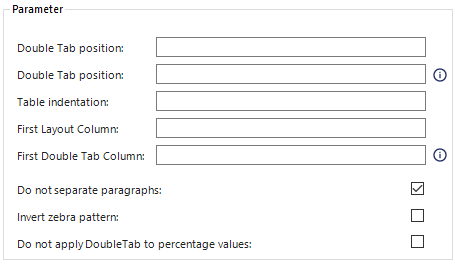 'Parameter' area in the 'Layout Action' dialog
Description
In the Parameter section of the Layout Action dialog, you can edit the properties of the table. The following options are available:
Table width
The absolute width of the table in cm, e.g. 15.5. Equivalent to the Preferred width table property in MS Word.
Double tab position
Moves the number in the table by the specified factor in order to ensure the numbers wrap around existing footnotes or brackets, for example. This value is specified in cm, e.g. - 0.2 would move the numbers 2 mm to the left.
In the example below, negative numbers are written in brackets in MS Excel. This has resulted in the numbers no long being positioned below one another (left-hand column). Entering a double tab in MS Excel will realign the numbers so they are below one another again (right-hand column):
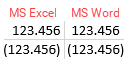 Using a DoubleTab to align numbers one below the other in MS Word
Table indent
The indent the table in cm, e.g. 2. Equivalent to the Indent from left table property in MS Word.
First layout column
Numerical value indicating which column should be treated as the first layout column. Layout columns are empty columns created between value columns in MS Excel.
Layout columns are used purely for aesthetic reasons.
If a column does not contain any content and its width is <= 0.5 px, the layout robot will register it as a layout column.
First double tab column
Numerical value indicating which column should be the first to include a double tab.
Do not separate paragraphs
Presents paragraph breaks in the table, ensuring it stays together as intended.
Invert zebra
Inverts the pattern of alternating colors used in a table (e-g- each white column is followed by a gray one, etc.).
Do not apply double tab to percentage values
The position of the double tab entered under the Double Tab position option is not applied to percent values.
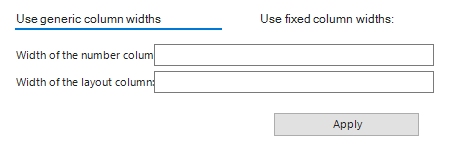 'Use generic column widths' in the 'Layout Action' dialog
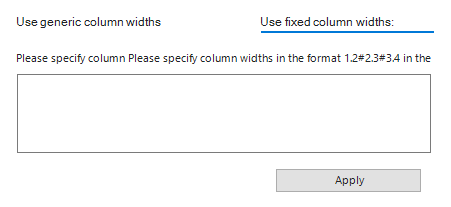 'Use fixed column widths' in the 'Layout Action' dialog
Description
In the Columns section of the Layout Action dialog, you can edit the column widths of the selected table. The following options are available:
Use generic column widths
Combination of fixed and calculated column widths.
For example, you can enter the widths for number columns and layout columns (in cm). The width of the name column is then calculated automatically.
This value is specified in cm. Alternatively, you can use an Auto column; the column width will then be calculated automatically based on the value you enter in the other column.
You can use generic column widths if your table regularly alternates between column types, e.g. Name column, Layout column, Value column, Layout column, value column, etc.
Use fixed column widths
Use this option to define fixed column widths.
You can use fixed column widths if you don’t want your columns to alternate regularly, e.g. if you want several Name columns next to each other.
When using fixed column widths, you will need to enter the width of each column in turn, in cm. Each width should be separated with a semi-colon, e.g. 0.3#1.2#2.0#3#4.1.
A separate layout robot can be stored for each document in Lucanet Disclosure Management.
To assign a layout robot to a document, you must open the Configure document workspace and add a layout robot in the Layout Robot settings area (see also Configuring a Document).
This is also where you can use the icon ![]() to save an already assigned layout robot locally, e.g. to use it in another document.
to save an already assigned layout robot locally, e.g. to use it in another document.
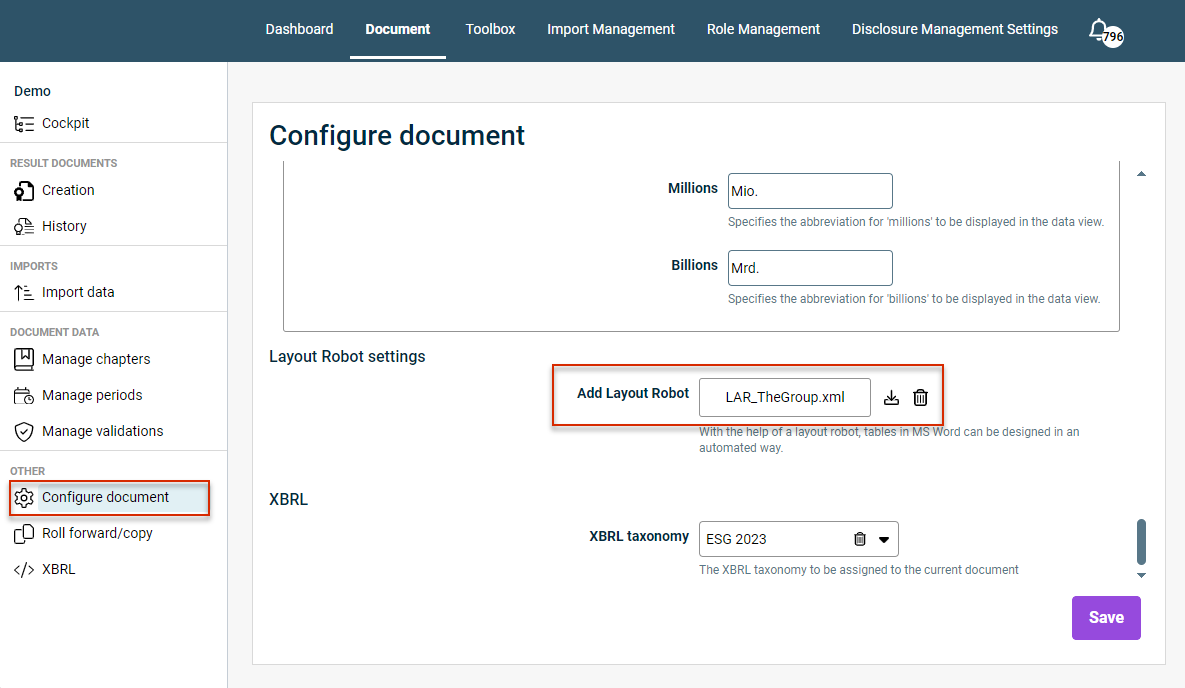 Assign, save, or delete layout robots